


When it comes to peptide research, precision isn't just a goal; it's the entire foundation upon which credible results are built. We've seen it time and time again: brilliant research designs can be completely undermined by one seemingly small misstep in the lab. And honestly, one of the most common—and most critical—of these steps is reconstitution. It's the moment you transform a stable, lyophilized powder into a viable solution for your study. Get it wrong, and you've compromised the very molecule you intend to study before you've even drawn your first dose.
That’s why our team at Real Peptides decided to put together this comprehensive protocol. We're not just a supplier; we're partners in research. Our commitment to crafting peptides through small-batch synthesis with exact amino-acid sequencing means we're deeply invested in seeing them handled correctly. This isn't just a generic guide; this is our professional methodology, refined over years of experience, for how to mix CJC 1295 Ipamorelin for injection to ensure maximum stability, potency, and reliability for your lab work.
First Things First: Assembling Your Lab Essentials
Before you even think about touching a vial, you need to have your workstation prepared. A clean, organized space is non-negotiable. We can't stress this enough. Contamination is the enemy of good science. Once your area is sterile, you'll need a few key items. Think of it as your pre-flight checklist.
Here’s what you absolutely must have on hand:
- Your Vial of Lyophilized CJC 1295 / Ipamorelin: This is the heart of the operation. Our CJC1295 Ipamorelin 5MG 5MG blend comes as a delicate, freeze-dried powder. This state, known as lyophilization, is designed for maximum stability during shipping and storage. It’s fragile and must be handled with care.
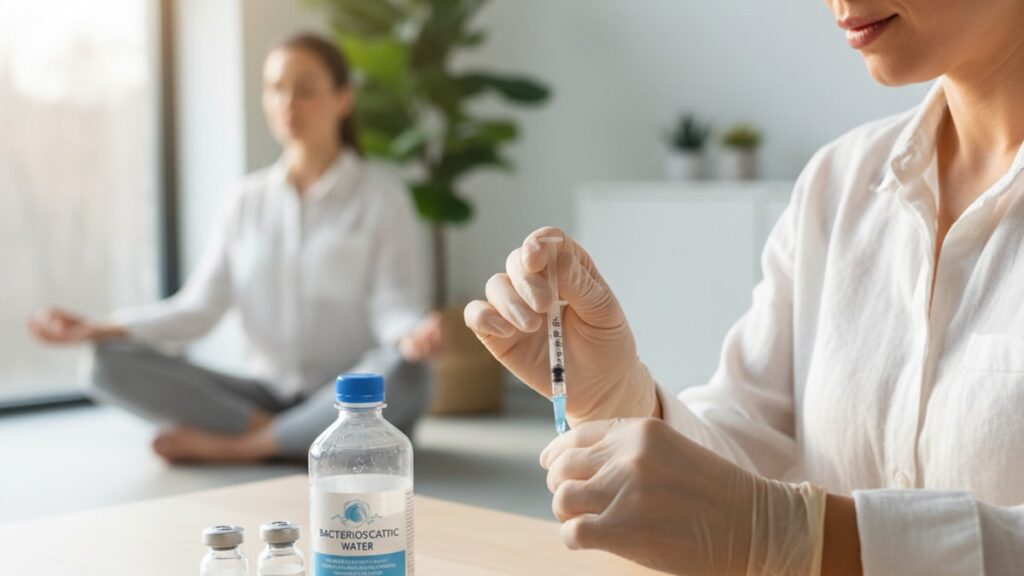
- Bacteriostatic Water: This is your reconstitution fluid, or diluent. We strongly recommend using high-quality Bacteriostatic Water for any multi-use vial. It's sterile water that contains 0.9% benzyl alcohol, which acts as a preservative. This tiny addition is a formidable defense against bacterial growth, allowing you to draw multiple doses from the same vial over several weeks without compromising its sterility. It's a critical tool for any serious lab.
- An Insulin Syringe (or multiple): You'll need at least one syringe to draw the bacteriostatic water and inject it into the peptide vial. We recommend using a new, sterile syringe for every single administration to maintain absolute purity and prevent cross-contamination.
- Alcohol Prep Pads: Sterility is paramount. You'll use these to wipe the rubber stoppers of both your peptide vial and the bacteriostatic water vial before puncture. No exceptions.
Having everything laid out and ready to go prevents fumbling and potential errors. It's a simple habit that pays huge dividends in the quality of your work.
Understanding the Reconstitution Triangle: Peptide, Diluent, and Technique
Mixing a peptide seems simple on the surface. You add liquid to a powder. Done. But the reality is far more nuanced, and understanding the 'why' behind each step is what separates amateur work from professional research. The integrity of the final solution depends on three things: the quality of the peptide, the choice of diluent, and your unwavering technique.
The Peptide: It all begins with the source material. The lyophilized powder in your vial is a complex chain of amino acids. These chains are what perform the biological action you're studying, but they are also delicate. Vigorous shaking or the introduction of contaminants can denature them, essentially breaking their structure and rendering them useless. This is why our commitment to purity at Real Peptides is so relentless; we provide a perfect starting point, so your technique is the only remaining variable.
The Diluent: The liquid you use to bring the peptide back into solution matters. A lot. While other options exist, our experience shows that bacteriostatic water is the gold standard for peptides intended for multi-use. Let's break down the options.
| Diluent Option | Key Characteristics & Use Case | Our Professional Recommendation |
|---|---|---|
| Bacteriostatic Water | Sterile water with 0.9% benzyl alcohol. The alcohol prevents bacterial growth. | The Gold Standard. Essential for multi-use vials. Extends the refrigerated shelf-life of the reconstituted peptide significantly, ensuring sterility for weeks. |
| Sterile Water | Simply sterilized water with no preservative. | Suitable for single-use applications only. Once the vial is punctured, it's no longer considered sterile for subsequent uses. Not recommended for peptide vials you'll draw from more than once. |
| Sterile Saline (0.9% NaCl) | Sterile water with sodium chloride. Creates an isotonic solution. | Can sometimes be used, but may affect the solubility or stability of certain peptides. We've found that bacteriostatic water provides more consistent and reliable results across a broader range of compounds. |
For a peptide blend like CJC 1295 / Ipamorelin, which you'll be using over a period of time, bacteriostatic water isn't just a suggestion. It's a requirement for responsible lab practice.
The Technique: This is where you, the researcher, have the most control. Your actions directly impact the final product. The goal is gentle rehydration, not a forceful combination. Every movement should be deliberate and careful, from the angle of the needle to the swirl of the vial. We'll dive deep into this next.
The Reconstitution Process: A Meticulous Step-by-Step Protocol
Alright, let's get to the core procedure. Follow these steps precisely. Don't rush. Don't approximate. Do it right every single time.
Step 1: Preparation and Sanitization
First, let your lyophilized peptide vial come to room temperature if it has been refrigerated. This prevents condensation inside the vial. Pop the plastic protective caps off both your peptide vial and your bacteriostatic water vial. Take an alcohol prep pad and vigorously wipe the rubber stopper on top of each vial. Let them air dry for a moment. This simple act drastically reduces the risk of introducing surface bacteria into your sterile solutions.
Step 2: Calculating Your Diluent Volume
This is a critical thinking step. How much bacteriostatic water will you add? This choice will determine the final concentration of your solution and make your dosing calculations either simple or complicated. Our team's recommendation? Keep the math easy.
A common and straightforward approach for a 10mg total peptide vial (like our CJC1295 Ipamorelin 5MG 5MG, which contains 5mg of each for a 10mg total) is to add 2mL of bacteriostatic water. Why 2mL? Because it creates a simple concentration that's easy to work with later. You can use other amounts, but for the sake of clarity, we'll proceed with this standard.
Step 3: Drawing the Bacteriostatic Water
Uncap your sterile insulin syringe. Pull the plunger back to the mark of the volume you intend to draw (e.g., 2mL, or 200 units on a standard U-100 insulin syringe). This pre-fills the syringe with air. Now, insert the needle through the sanitized rubber stopper of the bacteriostatic water vial. Invert the vial and inject the air into it. This pressurizes the vial and makes drawing the liquid out incredibly easy. Without this step, you'll be fighting against a vacuum.
With the needle tip submerged in the liquid, slowly pull the plunger back to your desired mark (2mL / 200 units). Check for any large air bubbles. If you see them, gently tap the side of the syringe to make them rise to the top, then push the plunger slightly to expel the air. Once you have an accurate, bubble-free 2mL of water, withdraw the needle.
Step 4: The Critical Injection – Be Gentle!
This is the moment of truth for your peptide. Take your syringe filled with bacteriostatic water and carefully insert the needle through the sanitized rubber stopper of the lyophilized peptide vial. Here's the most important part of the entire process: Do not inject the water directly onto the powdered peptide. This can damage the fragile amino acid chains through sheer hydraulic force.
Instead, angle the needle so that the tip is resting against the inside glass wall of the vial. Slowly, and I mean slowly, depress the plunger. Let the stream of water run gently down the side of the glass. The water will pool at the bottom and begin to dissolve the powder from below. This gentle introduction is the single best way to preserve the peptide's structural integrity.
Step 5: Gentle Mixing – Swirl, Don't Shake
Once all the water has been added, remove the syringe. You'll notice the powder beginning to dissolve. To complete the process, you must resist every instinct to shake the vial. Shaking is catastrophic. It causes shearing forces that can break the peptide bonds. It's a rookie mistake with serious consequences.
Instead, gently swirl the vial between your fingers or roll it between your palms. Be patient. It may take a minute or two, but the powder will fully dissolve into the solution. That's it.
Step 6: Verifying a Clear Solution
Your final reconstituted solution should be perfectly clear. Hold it up to a light source. You should see no cloudiness, discoloration, or floating particles. If you do, it could be a sign of contamination or that the peptide did not dissolve properly. A clear solution is your green light for proper storage and subsequent use in your research.
Demystifying the Math: Calculating Your Research Dose
You've successfully mixed your solution. Now, how do you draw the correct amount for your study? This requires some simple math, but getting it right is crucial for data consistency. Let's stick with our example: a 10mg vial of CJC 1295 / Ipamorelin reconstituted with 2mL of bacteriostatic water.
First, let's convert everything to the same units. Micrograms (mcg) are standard for peptide dosing.
- Total Peptide in Vial: 10mg = 10,000mcg
- Total Liquid in Vial: 2mL
Now, find the concentration (how much peptide is in each mL of liquid):
Concentration = Total Peptide / Total Liquid
Concentration = 10,000mcg / 2mL = 5,000mcg per mL
Most insulin syringes are marked in units, not mL. A standard U-100 insulin syringe has 100 units per 1mL. This means each 'tick' or unit on the syringe represents 0.01mL.
So, let's find the dose per unit:
Dose per Unit = Concentration per mL / 100 Units
Dose per Unit = 5,000mcg / 100 units = 50mcg per unit
There it is. That's your magic number. In this specific scenario, every single unit mark on your insulin syringe contains 50mcg of the peptide blend.
Let's say your research protocol calls for a 300mcg dose. The calculation is simple:
Required Units = Desired Dose / Dose per Unit
Required Units = 300mcg / 50mcg per unit = 6 units
You would simply draw the solution to the 6-unit mark on your syringe for a precise 300mcg dose. Taking the time to do this math once, and writing it down, saves a world of trouble and ensures every administration is accurate and repeatable.
Post-Reconstitution: Proper Storage and Handling
Your job isn't done after mixing. Protecting your investment and ensuring the solution remains stable is just as important. Once reconstituted, the peptide is far less stable than it was in its lyophilized form.
Refrigerate Immediately: The reconstituted vial must be stored in a refrigerator, typically between 2°C and 8°C (36°F and 46°F). Do not store it at room temperature for any extended period.
No Freezing: Let's be absolutely clear on this. Do not freeze your reconstituted peptide solution. The freeze-thaw cycle can damage and denature the peptide chains, destroying their efficacy. Refrigeration is the only correct method.
Protect from Light: Peptides can also be sensitive to light. Storing the vial in its original box or in a dark area of the fridge is a good practice to prevent potential degradation over time.
Shelf Life: When reconstituted with bacteriostatic water and stored correctly, a vial of CJC 1295 / Ipamorelin is generally considered stable for at least 4-6 weeks. This is why the choice of diluent is so important; with sterile water, the clock starts ticking much, much faster.
Following these storage rules ensures that the last dose you draw from the vial is just as potent and pure as the first. It's an indispensable part of good laboratory protocol, and it's how you can Explore High-Purity Research Peptides with confidence, knowing your handling methods match the quality of the product.
At the end of the day, learning how to mix cjc 1295 ipamorelin for injection is a foundational skill. It's a testament to a researcher's attention to detail. By mastering this process, from assembling your tools to calculating your final dose, you are actively ensuring the integrity of your work. Every precise measurement, every gentle swirl, contributes to the reliability of your data. This meticulous approach is the bedrock of discovery, and it's a standard we champion in everything we do.
Frequently Asked Questions
What happens if I accidentally shake the vial instead of swirling it?
▼
Shaking the vial can be detrimental. The mechanical force can denature the delicate peptide chains, breaking their structure and rendering them ineffective for research. Always swirl gently to preserve the molecule’s integrity.
Can I use sterile water instead of bacteriostatic water?
▼
You can, but only if you plan to use the entire vial in a single session. Sterile water contains no preservative, so once the stopper is punctured, it’s susceptible to bacterial growth. For multi-use vials, bacteriostatic water is essential for maintaining sterility.
How long is the reconstituted CJC 1295 / Ipamorelin solution good for?
▼
When properly reconstituted with bacteriostatic water and consistently refrigerated, the solution is typically stable for 4 to 6 weeks. Never use a solution that appears cloudy or has changed color.
My mixed solution looks cloudy. What should I do?
▼
A properly mixed solution should be perfectly clear. If it appears cloudy, it could indicate contamination, improper mixing, or a problem with the product. We strongly advise against using any solution that is not completely clear.
Why do I need to inject air into the bacteriostatic water vial first?
▼
Injecting an equal volume of air pressurizes the vial, making it much easier to withdraw the liquid. Without this step, you would be fighting against a vacuum, which can make it difficult to draw an accurate dose and can introduce air bubbles.
Is it safe to freeze the mixed peptide solution to make it last longer?
▼
No, you should never freeze a reconstituted peptide solution. The process of freezing and thawing can damage the complex amino acid structures, effectively destroying the peptide. Proper refrigeration is the only recommended storage method.
What is the best volume of water to add to a 10mg vial?
▼
While you can use various amounts, our team recommends adding 2mL of bacteriostatic water. This creates a simple concentration that makes dose calculations very straightforward, minimizing the chance for error in your research protocol.
Why does the water need to be injected down the side of the glass?
▼
Injecting the diluent directly onto the lyophilized powder can damage the peptide from the force of the stream. Running the water gently down the inside wall of the vial allows the powder to rehydrate slowly and safely, preserving its molecular structure.
Can I pre-load syringes with doses for the week?
▼
Our professional recommendation is to avoid this. Peptides are most stable when stored in the glass vial. Some compounds can adhere to the plastic of the syringe over time, potentially altering the delivered dose. It’s best practice to draw each dose immediately before administration.
What temperature should the peptide and water be before mixing?
▼
For best results, allow both the lyophilized peptide vial and the bacteriostatic water to come to room temperature before mixing. This prevents condensation and ensures a smooth reconstitution process.
Does the brand of bacteriostatic water matter?
▼
Yes, quality and purity are key. Always source your diluents from a reputable supplier to ensure they are sterile and properly formulated. Using a low-quality or non-sterile diluent can compromise your entire research project.
How do I know if the peptide has been damaged during shipping?
▼
Lyophilized peptides are quite stable. A properly handled product should look like a solid, dry puck or powder at the bottom of the vial. If it arrives looking gummy, melted, or dispersed all over the vial, you should contact your supplier.
